
Engineered Wood Floor Installation in Bakersfield, CA
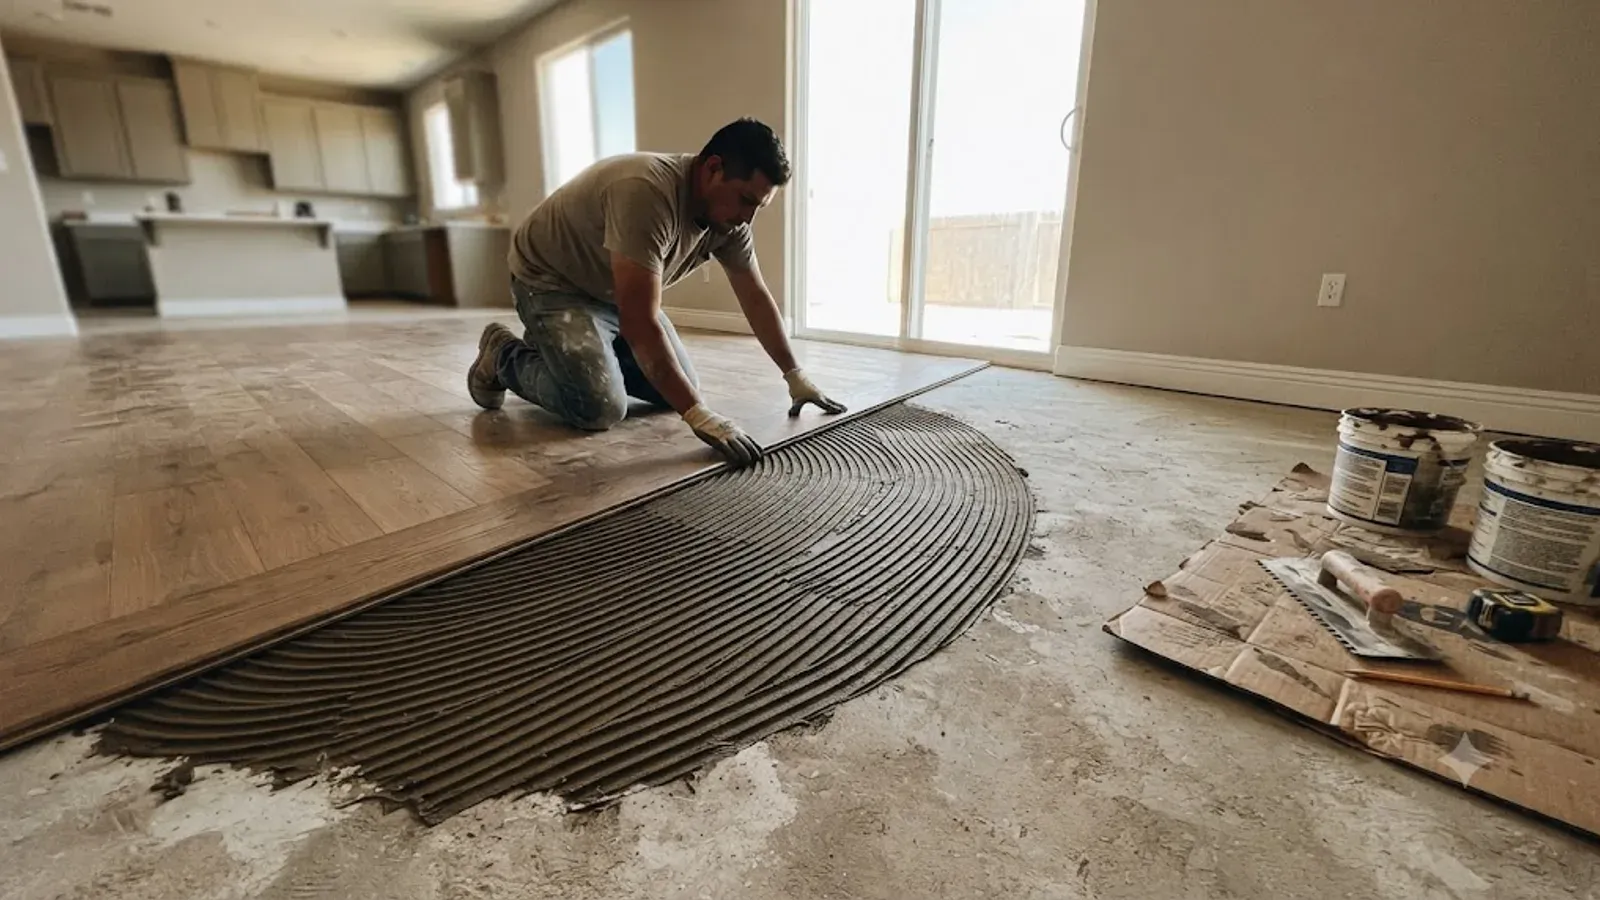
Bakersfield Premium Wood Flooring handles engineered wood floor installation in Bakersfield, CA, and it is the floor we install more than any other here — because most of this city sits on a concrete slab, and solid hardwood and slabs are a bad marriage. Every slab we glue to gets a calcium chloride moisture test first.
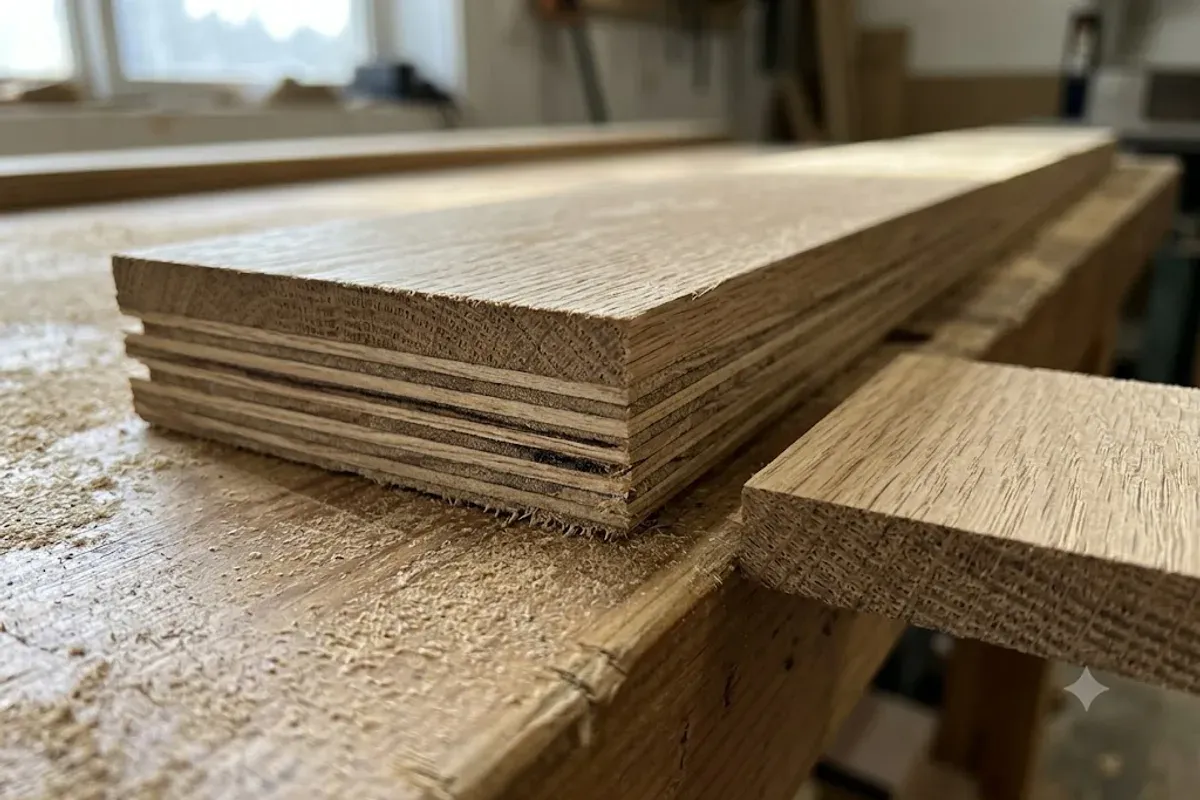
Engineered is real wood. The top layer is sawn hardwood, same species and same grain as a solid board. What is underneath it is cross-banded plywood instead of more oak, and that construction is why it holds still through a Bakersfield year while a solid board would be fighting the whole time.
Engineered Wood Flooring Construction and Wear Layer Thickness
Cut an engineered plank in half and you see the whole story. A sawn hardwood wear layer on top, then multiple plies of plywood beneath it with the grain of each layer running perpendicular to the one above. Wood moves across the grain, not along it, so alternating the direction means each ply cancels out the movement of its neighbors.
The number that matters most on the spec sheet is wear layer thickness. At 3mm or more, the floor can be sanded and refinished at least twice — it behaves like a solid floor for the rest of its life. At 2mm you get one light sand. At 0.6mm, which is what most of the big-box product uses, you get zero. When the finish wears through you replace the floor.
We generally will not quote a wear layer under 2mm for a primary living area. It is not that the product fails immediately; it is that you are buying a floor with a hard expiration date and most people are not told that at the point of sale. In a rental or a flip it can be the right economic call, and we will say so.
Core material matters too. Plywood core is what we prefer. HDF core is cheaper and flatter out of the box but far less forgiving if the floor ever meets water, and in a kitchen or a laundry room that is a real risk.
Slab Moisture Testing Before Any Glue-Down Installation
Concrete never fully stops giving off moisture. A slab poured in 1978 in Laurelglen is still moving water vapor upward, especially if it was poured without a vapor barrier underneath, which was common practice in a lot of this valley's tract construction. Glue a floor to that without checking and the adhesive bond fails from below.
So we test. A calcium chloride test sits on the bare slab for 60 to 72 hours under a sealed dome and measures how many pounds of moisture the slab emits per 1,000 square feet per 24 hours. Under 3 pounds and we are clear to glue with standard adhesive. Between 3 and 5, we use a moisture-mitigating adhesive or roll a membrane. Above that, the slab needs a proper epoxy moisture barrier before anything goes down.
In-situ relative humidity probes are the other method and, honestly, the more accurate one — a probe drilled into the slab at 40 percent of its depth, reading the RH inside the concrete rather than at its surface. We use them on commercial jobs and on any residential slab where the calcium chloride number comes back borderline.
None of this is optional and none of it is free, which is exactly why it gets skipped. A moisture test costs a couple hundred dollars and a couple of days. Replacing a failed 1,400 square foot glue-down floor costs five figures. We put the test on the estimate as its own line so you can see what you are paying for.
Glue-Down, Floating, and Nail-Down for Engineered Plank
Glue-down is our default over slab. The plank is bonded across its entire footprint, so it feels and sounds like a solid floor underfoot — no hollow report, no click when you cross a doorway. The adhesive also acts as a secondary vapor retarder. The tradeoff is that removing it later is genuinely difficult.
Floating is faster and reversible. Click-lock planks lock to each other over a foam or cork underlayment and are not attached to the slab at all. It is the right answer over radiant heat, in a rental turnover, or when a slab tests too wet to glue and the budget will not carry a moisture barrier. It will always sound slightly hollow, and no underlayment fully solves that.
Nail-down engineered is for the older raised-foundation homes — Oleander-Sunset, Westchester, the north side of the river. If you have joists and a wood subfloor but you want the dimensional stability of engineered rather than solid, you can have both. We use cleats or staples sized to the plank thickness, which is thinner than solid, so the fastener spec is different.
Whichever method, the perimeter expansion gap is not negotiable. Engineered moves less than solid, but it still moves, and a floor pinned tight against a wall on all four sides has nowhere to go but up.
How an Engineered Install Runs
- 1
Slab Test and Flatness Check
Calcium chloride or in-situ RH on the slab, plus a ten-foot straightedge across it. Both results go on the estimate before you commit to anything.
- 2
Product Selection
Wear layer, core material, width, and finish, sized to how the room is used. We will tell you when a cheaper product is fine and when it is a mistake.
- 3
Slab Preparation
Grinding high spots, patching or self-leveling low spots, removing old adhesive and any bond-breaking residue, then a full vacuum.
- 4
Acclimation
Engineered needs less than solid but it is not zero. Boxes come into the room, cross-stickered, for several days with the HVAC running the way you actually run it.
- 5
Layout and Dry Lay
Center line snapped off the room's main sightline, planks racked out ahead of the adhesive so color and grain distribute evenly instead of clumping.
- 6
Glue, Set, and Roll
Adhesive troweled with the manufacturer's notch size, planks set into the wet, and transfer checked by pulling a board periodically. Expansion gap held at every wall.
- 7
Trim and Walkthrough
Baseboard or shoe molding back on, transitions fitted at every threshold, then a low-light walkthrough with you before we invoice.
Engineered Wood Flooring — Common Questions
Is engineered wood flooring real wood?
+
How much does engineered wood floor installation cost in Bakersfield?
+
Can engineered wood be refinished?
+
Why do you insist on testing my slab?
+
Is engineered better than solid hardwood for Bakersfield?
+
Get a Free Engineered Flooring Estimate
We will test your slab, check it for flat, and quote the product that actually suits how your house is built. Mon-Fri 7am-5pm, Sat 8am-2pm.